Running Llama Aligned DeepSeek R1 on your own computer using mutliple NVIDIA GPUs
This article is going to show you how to run the Llama aligned DeepSeek R1 Distil models on your own computer using more than one NVIDIA GPU and Cuda. If you want to use just your CPU, a single GPU (with or without Cuda) or Apple’s Neural Engine, see the other versions of this article here.
You will need to have NVIDIA cuda drivers installed for this way of running the models, however if you don't want to install those you can follow the steps for Running Llama Aligned DeepSeek R1 on your own computer using Vulkan GPU drivers (the regular NVIDIA gaming drivers support this).
KoboldCPP is an excellent open source program that provides you with a Graphical User Interface to interact with LLMs, for the developers amongst you there is also an API using the familiar OpenAI format.
Blue Beck’s Llama Aligned DeepSeek R1 Distil models are fine tuned versions of Deep Seek AI's 8B and 70B R1-Distil models that culturally align with Meta’s Llama 3 series in order to be more suitable for public facing deployment in western countries, while retaining the reasoning capabilities the R1 based models are famous for.
Start by downloading the latest KoboldCPP with cuda support for your operating system from the downloads page here, Windows users should choose “koboldcpp.exe” and most Linux users should choose "koboldcpp-linux-x64-cuda1150", if you have a current generation GPU and the latest drivers you can try the cu12 / cuda1210 versions instead for a small performance improvement.
To get started just use the 4bit 8B version of the model, which you can download from here.
Once you've tried this and have it working see the notes at the bottom for larger versions of the model.
Once you have downloaded the model and KoboldCPP, it is time to get started.
You should satisfy yourself that the KoboldCPP executable that you downloaded from GitHub is safe (i.e. free from malware), here is one way to do this. Deciding to run the executable on your computer is your own responsibility and we in no way accept any liability for any consequences.
Depending on your system, you may need to grant KoboldCPP permission to run in your Operating System.
When KoboldCPP starts, you will see a menu like this.
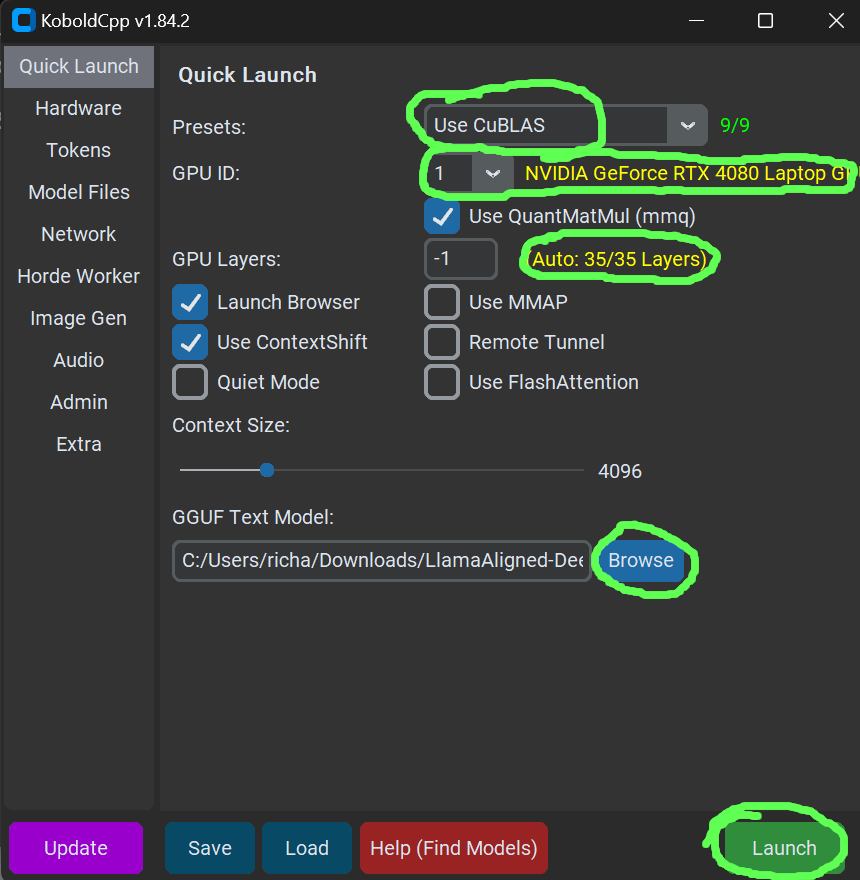
Ensure that for "Presets" the option "Use CuBLAS" is selected, and that after the dropdown for "GPU ID" set to "all".
Click the “Browse” button under where it says “GGUF Text Model”, then select the model file you downloaded, i.e. LlamaAligned-DeepSeekR1-Distil-8b.Q4_K_M.gguf
"GPU Layers" should be set to -1 (for auto), and the yellow text after it should indicate how many of the models layers will use the GPU, ideally this will be all of them, otherwise you will take a big performance hit.
In the screenshot above, 35 of 35 (i.e. all of the) layers will be loaded on to the GPU, which is what we want.
If you are seeing less than all of the layers will be loaded on the GPU (i.e. if it said 26/35) and you are sure you have enough free VRAM between your GPUs, navigate to the "hardware" tab (2nd option in the options down the left hard side).
In the box next to "Tensor Split" enter a sequence of numbers corresponding to the sizes of your graphics cards in the order of their GPU IDs (you can see which card is which ID by selecting the different IDs in the GPU ID dropdown).
So if you had 2 3090s (24GB each) with the first 2 GPU IDs and 2 3060s (12GB each) with the last 2 GPU IDs, you would enter 24,24,12,12 in the box. Then set the "GPU Layers" box to the actual number of layers in the model (i.e. 35 in this case).
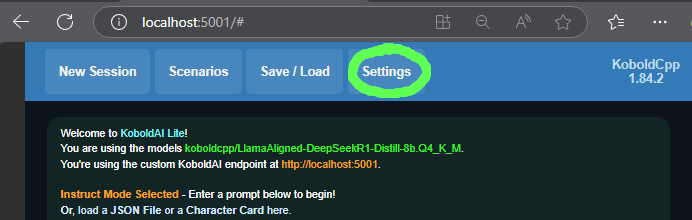
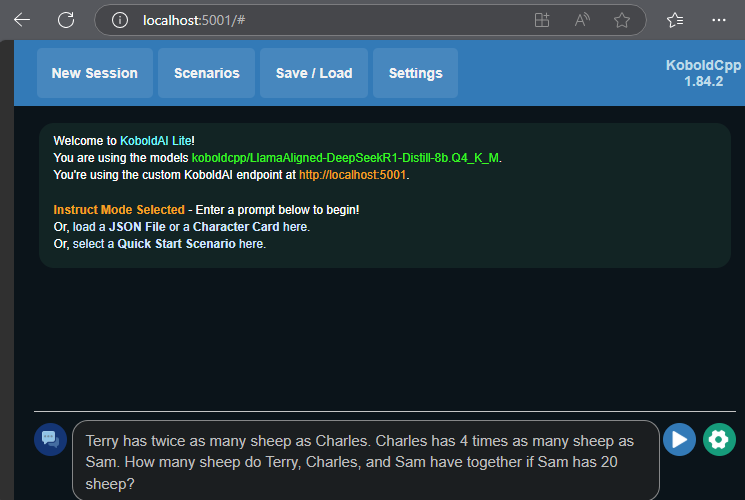
You can now click Launch in the bottom right hand corner, which should open your web browser pointing to a local URL (something like http://localhost:5001/#) where you should see the user interface for using the LLM.
The first thing you need to do is to click the “Settings” button on the top bar.
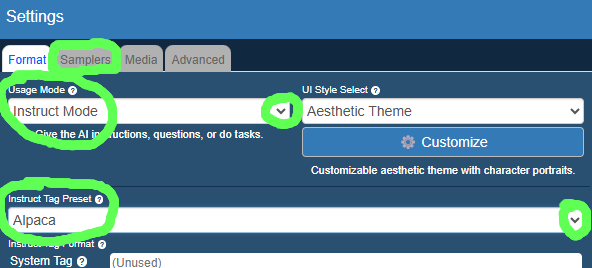
This will open a window like the one below. Where it says “Usage Mode” select “Instruct Mode” from the drop down menu, and where it says “Instruct Tag Preset” select “Deepseek V2.5”.
Now change tabs by clicking “Samplers” just under the heading of the settings window.
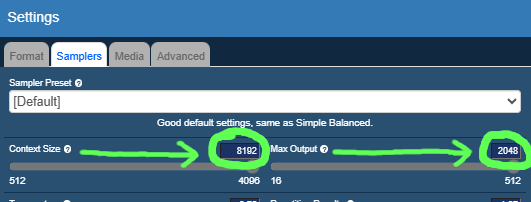
Where it says “Context Size” set the number to 8000 (or higher), and where it says “Max Output” set the number to 2000 (or higher), you will need to change the numbers by clicking on them and editing rather than using the slider bar (DeepSeek R1 based models won’t work well with the smaller number range the slider gives, see the bottom of the article for an explanation).
Once you’ve done this press OK to go back to the main interface.
Everything is now ready and you can go ahead and ask a question, just type in the text box at the bottom and click the send button  like in most chat user interfaces.
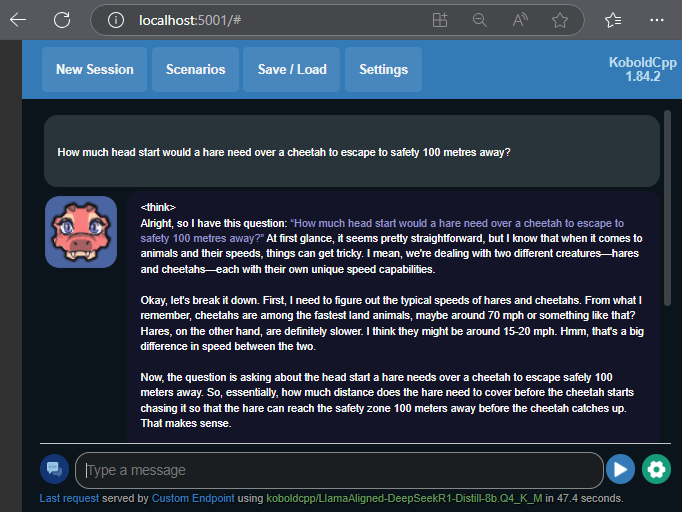
For questions where the model uses an element of reasoning, you will see it output a tag <think> followed by its chain of thought before it gets to its final answer.
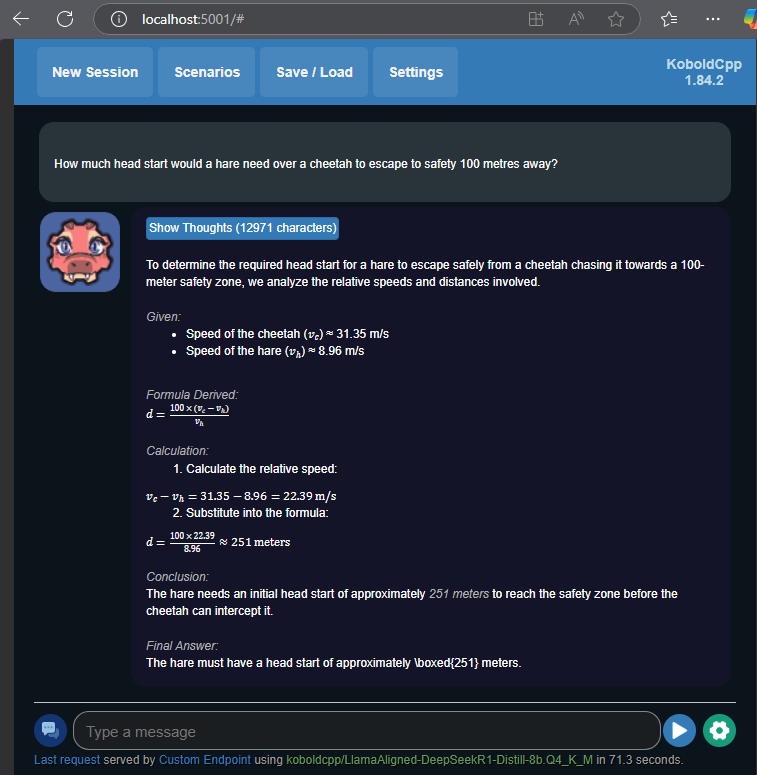
If it stops while it’s still in this process, just press the send button again without typing anything. Once the model has arrived at its final answer, you should see output formatted like this.
If you want to ask further questions that relate to your previous question just go ahead and type them like in any other chat interface, however if you have a new unrelated question everything will be faster and use less memory if you first click “New Session” in the top left (just press OK on “Really Start A New Session?”).
Additional Notes:
1) The reason for setting “Context Size” and “Max Output” to relatively large numbers is the fact that reasoning models such as those based on DeepSeek R1 output a lengthy chain-of-thought before answering the question. “Context Size” is effectively the maximum size of the whole conversation, and “Max Output” is how much output the model is allowed to generate before KoboldCPP forces it to stop. The default values for these (and even the maximum values of the sliders) are too small to accommodate the full chain of thought output.
2) The 8bit 8B version of the model can give improved results at a cost of approx 4GB of extra VRAM usage. This can be downloaded from here. Note that even though the model has 8 billion parameters, which at simply 8 bits per parameter would fit in 8GB of VRAM, the model won't fully fit on an 8GB card (or 2 4GB cards), this is because not every parameter is quantised to 8 bits so the model is actually a bit larger than 8GB. You can load this comfortably with a 4GB card and a 6GB card.
3) If you have plenty of VRAM (48GB+) you can try the 70B model, this will load and work well on a pair of 24GB consumer GPUs like the 3090 or 4090. This 70B model is a really powerful model on a different level to the 8B version, far closer in output quality to the largest R1 model or other reasoning models you may have used in the cloud. Download the 4bit version from here, or if you’ve got even more VRAM (80GB+) you can try the 8bit 70B version, which is downloaded in 2 parts (just open part 1 in KoboldCPP as long as part 2 is in the same folder), download part 1 here, and download part 2 here.
4) If you have 32GB+ of VRAM but not enough for the 4bit 70B model above, there is a 3 bit version you can try that may fit in your VRAM. It should be pointed out that this does noticably lose some quality and speed compared to the 4 bit version. The 3bit 70B version of the model can be downloaded from here.